The Body field is where you will enter all of the content for your new page - text, links, images, etc. The formatting toolbar (also known as the Editor) at the top has a variety of formatting options.

The Body field is where you will enter all of the content for your new page - text, links, images, etc. The formatting toolbar (also known as the Editor) at the top has a variety of formatting options.
The formatting toolbar (also known as the Editor) at the top has a variety of formatting options.
 Allows you to format your text as bold or italic.
Select the text to be formatted and click the toolbar icon to toggle on the preferred formatting.
 Allows you to insert a bulleted or numbered list.
Select the text to be formatted and click the toolbar icon to toggle on the preferred list formatting. Use the drop-down menu next to the list icon to select different number Types for the list. Bullet types are set by the theme.
 Allows you to indent a list item or a section of text to the left or right.
Select the text to be formatted and click the toolbar icon to toggle on increase or decrease indent.
 Allows you to undo or redo tasks you have performed in the body field.
Click the appropriate toolbar icon to undo or redo a recent task.
 Allows you to create different types of links in your content.
Select the text or image you want to make a link and click the Insert/Edit Link icon on the toolbar to open the properties window.
NOTE: Always check the links you are including on your website - both when you are adding them for the first time, and periodically throughout the life of your site. Links frequently change or are removed as websites are modified over time, and it's a good rule of thumb to not have broken links on your website.
Enter the external link URL in the Link URL field; be sure to enter the entire URL, including the initial http://.

Click Insert to create the link.
NOTE: External links do not open in an new tab. This allows users to be in control of their experience, and they will always have the option to use the Back-button to return to the previous page.
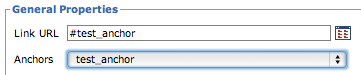
Enter your page path in the Link URL field.
To obtain your page path for the internal link:

Click Insert to add the link.
Click the Browse icon next to the Link URL field.
Click the first Upload button.
Click Choose File to browse to your file and click Open.
Click the second Upload button to upload the chosen file to the web server.
With the file highlighted in the file browser, click the Insert file button.
Click Insert to create the link.
NOTE: When linking to PDF, DOC or other types of files, it's a good idea to note what type of file the text is linking to, as well as the file size. This helps users know that they will be viewing a file different than a web page, as well as about how long they can expect it to take to load the file.
On most Drupal websites, there is an individual file upload limit of 5MB. This limit ensures that we maximize the amount of server space we are limited to on the web server. We currently host and support over 400 websites on this server, and need to ensure that everyone has enough room for their site files.
If you have a PDF file that is over 5MB that you need to upload to your website, you have a couple options:
Feel free to contact us for assistance if you need help with optimizing your files.

 Allows you to remove a link from text or an image.
Select the linked text or image and click the Unlink icon on the toolbar.
 Allows you to insert an image on the page. Learn more about photo usage.
All edits, including cropping, should be done before inserting your image on the page. Aviary (by Adobe) is an easy-to-use, free online photo editor.
Position the cursor at the beginning of the text/paragraph where the image should be placed.
Click the Insert/Edit Image icon on the toolbar.
Click the Browse button next to the Image URL field.
Click the first Upload button.
Click the Choose File button to browse to your image file and click Open.
Click the second Upload button to upload it to the web server.
With the file highlighted in the file browser, click the Insert File button. The Image URL field will be populated with the appropriate image path.
Enter brief text to summarize your image in the Image Description field.

NOTE: In order to comply with ADA laws, it is important that any images containing text or links also include Image Descriptions. This text ensures that any information displayed in the image can also be read by screen readers.
The Alignment, Dimensions, Border, Vertical Space and Horizontal Space fields are deprecated and should NOT be used. Always resize your images to the size you want them to display on the page PRIOR to uploading them to the site.
Click the Insert button to place the image in the body field.
To align your image, make sure the image is selected and choose Image Right Border or Image Left Border from the Styles menu

Be sure to align images using the Styles menu on the toolbar; DO NOT use the alignment menu within the Image Properties box, as this has been deprecated.
When you are adding images to your web pages, it is important that you use a photo editing program (like Adobe Photoshop or Aviary) to resize the image to the dimensions you want it to display at BEFORE you upload the image to your site for placement. The image properties width and height settings should NEVER be used to resize an image on a web page.
Uploading a large image (i.e. 1200 pixels wide) and then forcing it to resize using the Image Properties settings for width and/or height to display the image smaller (i.e. 200 pixels wide) causes two main issues:
 Allows you to format your text slightly above or below the standard text line.
Select the text to be formatted and click the toolbar icon to toggle on the preferred formatting.
Textsuperscript
Textsubscript
 Allows you to indent a section of text on the page, as well as to format it with larger text.
Select the text to be formatted and click the Block Quote icon on the toolbar.
This text has been formatted with Block Quote.
 Allows you to insert a horizontal line on the page.
Position the cursor where the horizontal line should be placed and click the Insert Horizontal Line icon on the toolbar.
This is an example of a horizontal line:
Allows you to position images, aligned to the right or left.
Select the image to be aligned and choose the desired option from the Styles drop-down on the toolbar.
 Allows you to select different type formatting for titles, subtitles and text. Heading 3 defines the most important heading. Heading 6 defines the least important heading.
Typically we recommend that you use Heading 3 for paragraph titles, Heading 4 for paragraph subtitles and Paragraph for body text.
Select the text to be formatted and choose the desired option from the Format drop-down on the toolbar.
 Allows you to remove text formatting that you have added, using the Editor options, in the Body section. Select the text that you would like to remove the formatting from, and click the Remove formatting icon on the editing toolbar.
 Allows you to insert a table on the page.
Position your cursor where the table should be placed on the page.
Click the Insert/Edit Table icon on the toolbar.
Enter the Columns and Rows for your table.
Cell Padding, Cell Spacing, Alignment, Border, Width and Height are all formatted by the theme styles, so these fields can be left as their defaults.
Click Insert to create a blank table on the page.

An empty table will be inserted into the body field.

Position your cursor in each cell to enter content into each table cell. Cursor keys can be used to move between cells within a table.
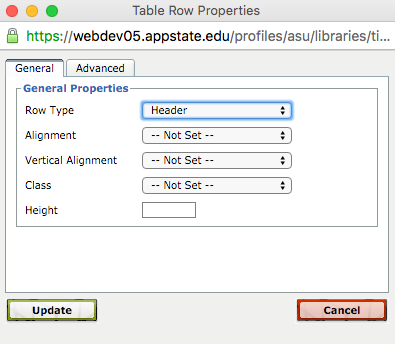
To create column or row headers for the table, enter the text into these cells and select the cells with the cursor.

Click the Table Row Properties icon in the toolbar. (You may also perform this action using the Table Cell Properties icon.)

Select Header from the Row Type (or Cell Type) drop-down and click Update.
You also have additional Table Properties options. Select the cells you want to modify in your table and use the additional table formatting icons in the toolbar as desired.
 Format Table Row Properties
Format Table Cell Properties
 Insert Row Before
 Insert Row After
 Delete Row
 Insert Column Before
 Insert Column After
 Delete Column
 Split Merged Table Cells
 Merge Table Cells
 Allows you to embed video on your page.
Position cursor where video should be positioned on the page. Click the Video Filter icon on the toolbar to open the Insert Video properties window.
Enter link in Video URL field. Expand the Instructions section for information on formatting video links based on source (YouTube, Vimeo, ASU Streaming Server, etc).

Set player Width and Height in appropriate fields if desired. Entering Width only will cause Height to default to correct dimension. If entering both Width and Height, be sure to use proportional dimensions.
Set Align left, right or center if desired. The player will default to align left if Align menu is set to None.

Check Autoplay box if you would like video to play when the page loads. It is recommended to leave autoplay disabled, to allow users to control video playback.

Click the Insert button to insert the formatted video link into the body field.
Click Save to see the video displayed on the page.
 Allows you to strip any formatting from the source prior to pasting into the body field.
Copy the text from the source (Word file, Excel file, other web page, etc) and click on the Paste as Plain Text icon to toggle the feature on. Paste the text into the body field using standard keyboard shortcuts: CTRL-V (PC) or CMMD-V (MAC). Format text as desired using the Editor Options.
NOTE: Always use this option when pasting content into the body field; stripping source formatting prior to putting it into the web page prevents display and validation errors.
The most common issues arise from pasting content directly from Microsoft Word into a web page. Word is a document and word processing application that uses different formatting than a website, which uses HTML to format text and images. When content is pasted from Word directly into a website, sometimes the formatting cannot properly be converted to HTML. Here is a sample of the display errors that may occur from pasting content directly into the body field:

The Paste as Plain Text tool allows you to strip any external formatting from your content before pasting it into the body field of the website. While this does require you to format your text using the website formatting toolbar, it ensures that your text and images will be properly displayed on your website.
 Allows you to Find or Find/Replace a word or phrase throughout the text in the body field.
To search for a word or phrase in the body field, click the Find icon on the toolbar. The Find tab displays by default.
Enter the word or phrase in the Find What field.
Select the Direction for the search, up or down.
Check the Match Case option if the search should include case.
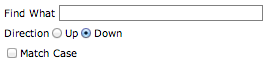
Click the Find Next button to start the search.
To find and replace a word or phrase in the body field, click the Find/Replace icon on the toolbar. The Replace tab displays by default.
Enter the word or phrase in the Find What field.
Enter the new word or phrase in the Replace with field.
Select the Direction for the search, up or down.
Check the Match Case option if the search should include case.
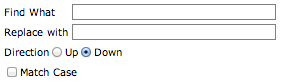
Click the Find Next button to start the search, the Replace button to replace the selected instance of the word or phrase, or Replace All to replace all instances of the word or phrase in the body field.
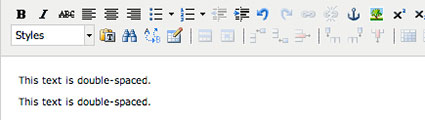
To create single-spacing within your body text, use a soft return (SHIFT+RETURN keys on your keyboard).

To create double-spacing within your body text, use a regular/hard return (RETURN key on your keyboard).