Panels

Panels allow you to create custom layouts for pages on your site. A panel is made up of multiple regions, or panes, that allow you to define areas on the page where content can be displayed.

In order to add a panel page to your site, the panels module must be enabled on the website.

NOTE: Before you create your panel, the content that you will use to populate the regions of your panel page may be created or already exist (i.e. pages or blocks). Be sure to make a note of the titles of each of the pages you will be pulling into the panel page. 

Choose Layout

To begin creating a Panel, from the admin menu, select Content - Add content. On the Create content page, click Panel.

Choose Layout

From the Category drop-down, select the layout type. Options include:

  • Columns: 1
  • Columns: 2
  • Columns: 3
  • Columns: 5

Category specific layout options will display when you select a Category option. Click the desired layout for the Panel.

columns for panel layout

Create Panel

Title

Enter the Title for your Panel.

Title field

Menu Settings

See menu settings for more information on providing a menu link.

Other Settings

For information on Revision informationAuthoring information and Publishing options, see their respective instruction pages on this website.

Save

Click the Save button when you have completed entering the Panel content.

Panel Content

To begin adding content to a Panel, click the Panel content tab.

Panel Content

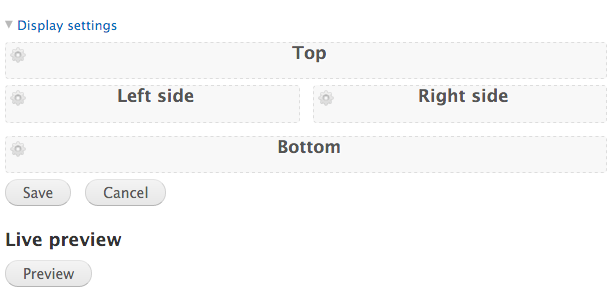
The regions of the Panel Page are displayed.

Panel Regions

To add content to a Panel region, click the gear icon in the upper left corner of the region to which content is to be added.

Gear icon

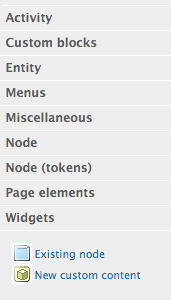
Click the Add content link that displays to view the Add content window.

Add Existing Node Content

To add an existing page as content for a Panel region, click the Existing node link.
Existing node

Enter the title or NID of a node

Begin entering the title of the existing page you are adding to the Panel region; select the desired page title from the drop-down that appears with matching results.

Existing node title

Override title

Leave Override title unchecked and blank to use the Page title as the Panel region title.

Check Override title and leave the field blank to display no Panel region title.

Check Override title and enter a different title to change the Panel region title.

Override title

Leave node title

Leave node title should remain unchecked.

Leave node title

Link the node title to the node

Check this box if you would like your pane title to link to the page.

Link node title

Include node links for "add comment", "read more" etc.

Checking this box will put add comment (if comments are enabled for the page) and read more (useful if Build mode is set to Teaser) links on the bottom of the panel region.

Uncheck this box if Build mode is set to Full node, since the entire page content will already be displayed on the Panel, and a read more link will be unnecessary.

Include node links

Template identifier

Leave the Template identifier field blank. The Panel template is set by the ASU/RCOE theme.

Template identifier

Build mode

Select a Build mode for the page to be displayed on the Panel:

  • Full content: Entire page content will be displayed
  • Teaser: Only initial page content will be displayed 

Build mode

Finish

Click the Finish button to return to the Panel content page.

Save

Click the Save button to save the Panel page.

Add Custom Content

To add custom content for a Panel region, click the New custom content link.

New Custom Content

Administrative title

Enter the Administrative title of the existing page you are adding to the Panel region. This title will be used administratively to identify this pane. If blank, the regular title will be used.

Administrative title field

Title

Enter the title of the existing page you are adding to the Panel region. This Title will apear on the panel page.

Title field

Body

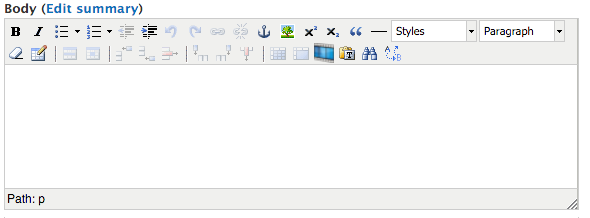
The Body field is where you will enter all of the content for your new custom region - text, links, images, etc. (see Editor Options).

Body field

Finish

Click the Finish button to return to the Panel content page.

Save

Click the Save button to save the Panel page.

Add Block Content

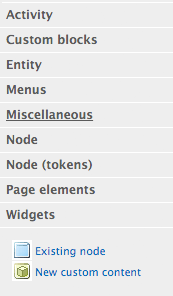
To add an existing block as content for a Panel region, click the Miscellaneous link from the Add content window. To add a Text Block as content for a Panel region, click the Block: Text Block link for the Add content window

Add Miscellaneous content

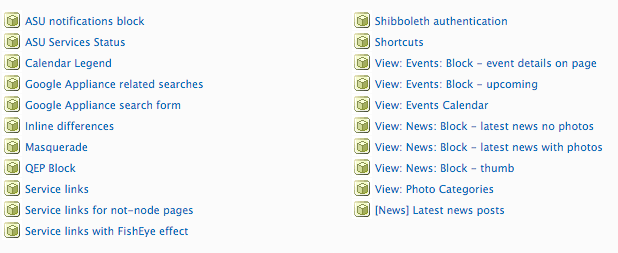
Select the Block or Text block to be added to the Panel from the options listed.

Add block

Override title

Leave Override title unchecked and blank to use the Page title as the Panel region title.

Check Override title and leave the field blank to display no Panel region title.

Check Override title and enter a different title to change the Panel region title. NOTE: You will always want to check this box when adding Text blocks to prevent the Title from displaying twice.

Override title

Finish

Click the Finish button to insert the block content into the panel region.

Save

Click the Save button to save the Panel page.

Edit a Panel Page

Edit Panel Page Settings

To edit the TitleRevision informationAuthoring information and Publishing options of the Panel, see Edit a Page for more information.

Edit Panel Existing Node

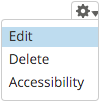
When viewing the panel page, hover over the region with the content to be edited. A gear icon will appear in the upper right corner of the panel region. Click on Edit to edit existing node content.

Edit node button

Edit Panel Custom Content

Click the Panel content tab. Find the Custom region that you want to edit and click on gear icon in upper right corner of custom region. Click on Edit to edit custom content. Once changes are completed, click the Finish button.

Edit custom content

Edit Panel Block Content

When viewing the panel page, hover over the region with the block to be edited. A gear icon will appear in the upper right corner of the panel region. Click on Configure block to edit the block content. 

Configure block

Save

Click the Save or Save block button to save the changes for display on the Panel.